lots of questions on how I did the glue effects on the dwarven forge tiles
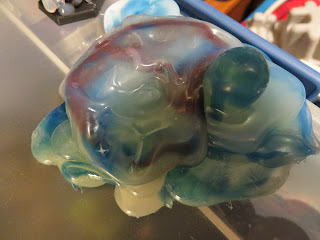
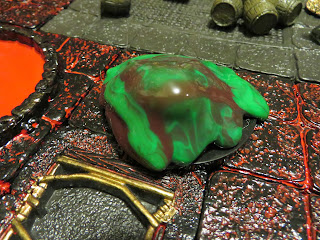
I didn't paint the slimes - I got colored glue sticks from amazon - just make sure you get the correct size for your glue gun, most colored sticks are for the mini glue gun.... only a few are made for full size glue guns...(don't try to stick the wrong size in a glue gun). ;-) here's my learning xp on trying that(and how to fix the glue gun afterwards). change glue sticks for the mixed colors. kind of mix them together slowly. red/burgandy is great as it looks like it just ate something
http://realminis.blogspot.com/2013/10/fixing-glue-gun.html
the extended "reaching" look put on the glue and let cool enough so its not running, but still moves, tilt the tile and use gravity.... careful if its still too runny, as it will want to keep going and detach like a drip.... i found i had to keep tilting it back and forth if too running and even flip back and go back in, then try again when not so runny.
 |
| One on the right used this gravity effectfrom tilted tile to reach out, one on the left, just dripped glue down the wall |
webbing was just adding a thin strip of glue at a time and layering
 |
| layered thin trail slime effect |
And the folding looking part - is carefully blowing on the glue to warp it a bit ( you can use a straw so you don't get your face so close)
 |
| bottom of slime below gravity effect - used a straw to blow the glue into the crevices and get the warped folded look |


