2013-11-09

Dwarven Forge's Game Tiles plus slime equals awesome

One thing thats great about having soooo many DF tiles is that some can be dedicated to other things - such as a few slimy slimes.....   5 sets gives me lots of extras for fun stuff like below.   Painted some of my tiles and then slimed them up.

Dwarven Forge's Game Tiles plus slime equals awesome

The various Dwarven Forge Game Tiles were decorated with yellow and green hot glue to make the slime

The various Dwarven Forge Game Tiles were decorated with yellow and green hot glue to make the slime.  This one has a great starburst pattern.

The various Dwarven Forge Game Tiles were decorated with yellow and green hot glue to make the slime

The various Dwarven Forge Game Tiles were decorated with yellow and green hot glue to make the slime.  This one looks like something coming out of the slime to grab you

The various Dwarven Forge Game Tiles were decorated with yellow and green hot glue to make the slime.  The mummy tries to command the slime and fails (rolled a 1).  ;-)

dome or rising / aggressive slime how too

dome or rising / aggressive slime how too:

start with a puddle of hot glue and cut off a piece of glue stick from another stick at an angle - let it cool for a few seconds so that its not quite as runny, but still liquid enough to stand your glue stick in it.  

let it cool

add a small layer on top - not too much or you will just melt your glue stick

let it cool and keep adding layers after each one cool, don't add too much to any layer, or you risk melting your earlier layers.

starting to take shape

now if you want it to be colored use the color you want - not too thick if you want the opaqueness to come thru nicely on the dome

let it cool

the opaqueness shows up nicely - as you add the layers of green, mix it with more clear/opaque to make a nicely mixed watery slimy looking puddle

viola - it looks like that slime is rising off the table to come and get you

green slime

turned out great!


Final step once you're done and slimes are all cooled - i always wait until at least the next day.

Is to seal the slimes - you can paint 1st if you didn't use the colors you like, but if you don't seal, the slimes will take fingerprints and fuzz can stick to them - this depends on the hot glue you use of course - some glue is better then others.

I have been sealing with 'Rust-Oleum Zinsser 408 Bulls Eye Clear Shellac Spray' - seals great and leaves a nice shiny coat

Painting DF Dwarven Forge as a standard dungeon

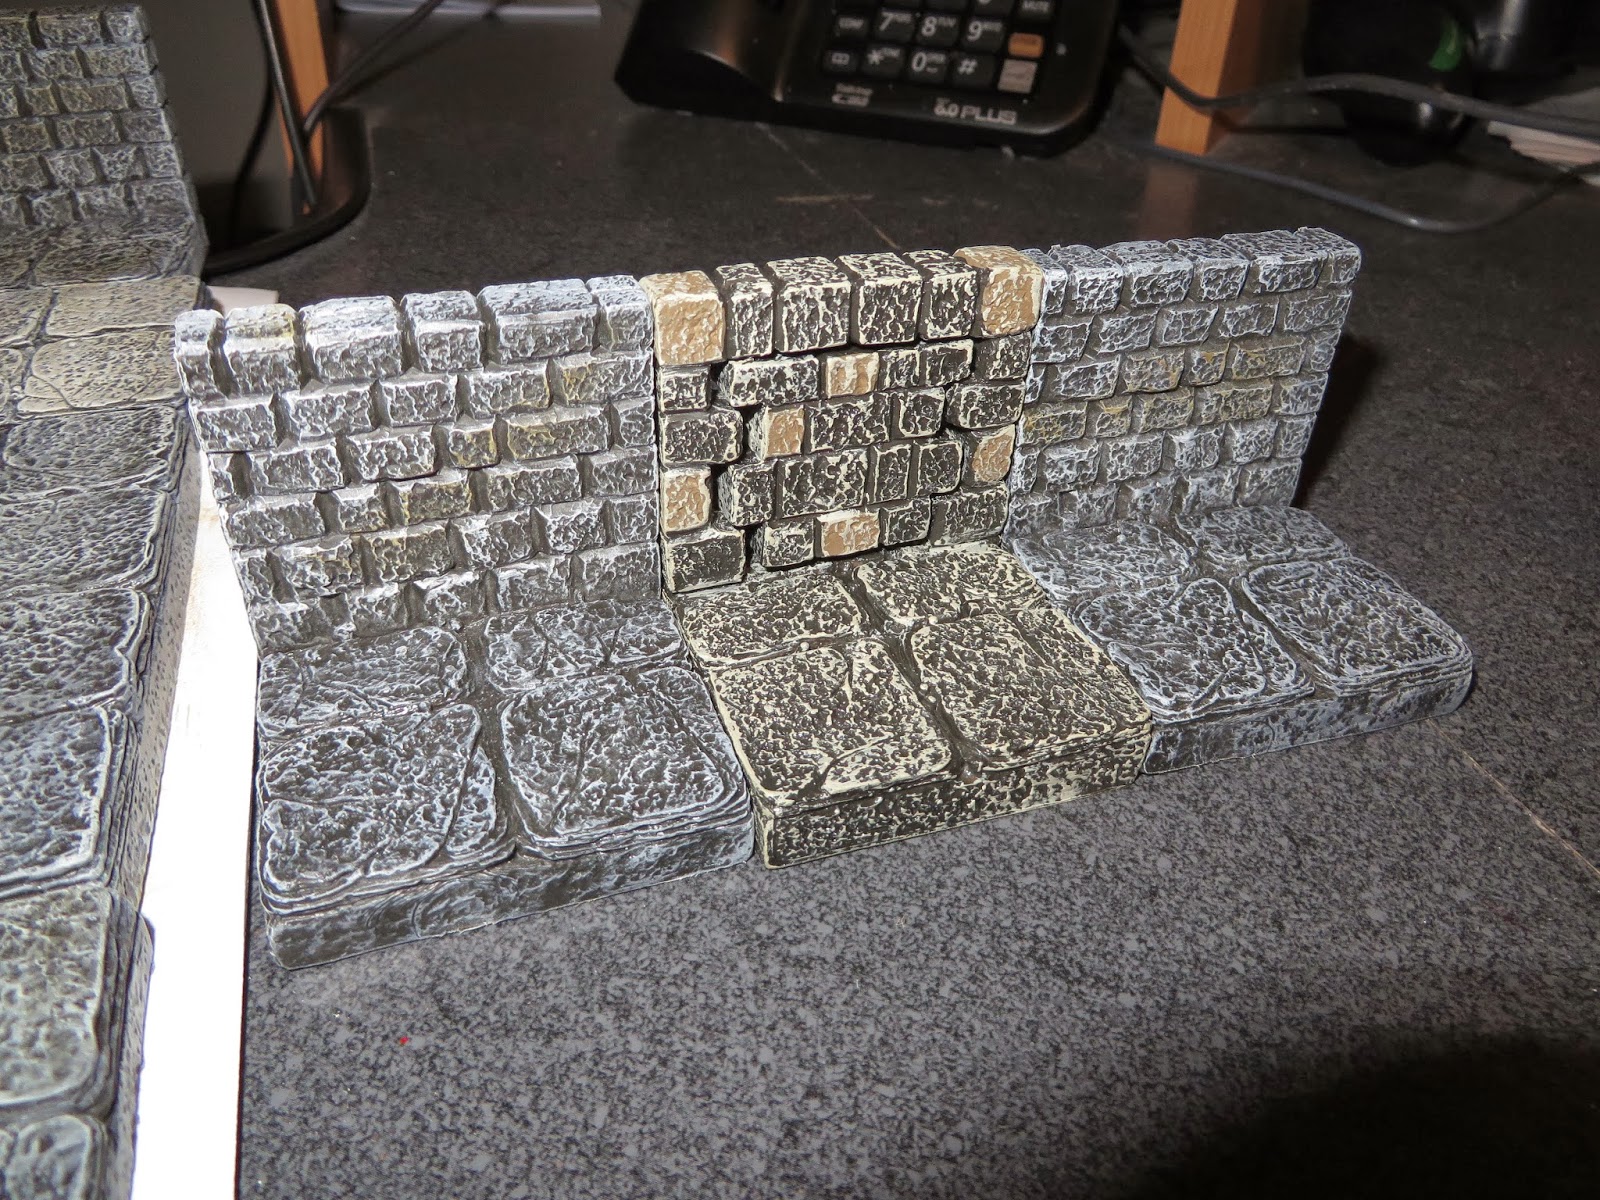
SO I started out with painting my DF tiles with the full 4 step process from Stefan's video(minus the random earth stone brick) , and then compared the pre-painted tiles I got.  I think I was in the unique position as I got unpainted base sets and some of my addons painted.... I think a lot of people went all painted or all unpainted(exect a CoS set) or if some did get the painted addons, they didn't get the set of 4 pokorny paints like I did.

So once I was done painting the 1st batch I did - I compared it to the DF factory painted, and I realized a couple of things.

I painted the right and left tiles - middle tile is factory painted - notice how much better the earth stone looks as a dry brush - doesn't stick out so much.


1. factory painted looks like it used 2 steps, not 4
2. the drybrush for the factory painted didn't match any of the 4 bottles of pokorny paints(this is why I say it looks like not a lot of people got both painted and unpainted, and the set of paints - or this would have been noticed)
3. the factory painted with 2 steps still looks great, so no need to do 4 steps..... so

I started doing the tiles with just a drybrush of stone edge which was the closest color to the factory dry brush.  I think they turned out great with just this(and saves a lot of time).

But then I also figured out something great.  Instead of the earth stone painted heavy on a single stone.  I used it as a dry brush for random sections of wall - it looks great this way and really gives the wall that old timey "lived" in look like a real old dungeon.

Also for my brushing - I varied the pressure and the wetness to give the dungeon a really variable look, so its not uniform.

I am also going to be adding some random green highlights for mold/algae, and some reddish highlights for old blood.

but you get a great looking dungeon with:
1. drybrush of stone edge everywhere
2. hits of earth stone randomly

painted next to unpainted before adding the final layer of dry brushing with stone edge 

painted next to unpainted before adding the final layer of dry brushing with stone edge 

painted next to unpainted before adding the final layer of dry brushing with stone edge 

after adding the final layer of dry brushing with stone edge 

earth stone looks great on the barrels


painted and earth stone added as a dry brush


2013-10-31

Reaper bones lab mutant painted up

Reaper bones lab mutant painted up - looks like a M.U.S.C.L.E. man.
77170: Clay Golem

Homemade blood red gelatinous cube

This gelatinous cube gained its blood red color when it consumed a ornery wizard who was so worried about being eaten when he was in the wilds - he had cursed his own blood.   It also gained a small measure of sentience.  Needless to say, the wizards curse ended up being an utter failure.

2013-10-30

Step by step guide to painting Dwarven Forge Chamber of Sorrows

Dwarven Forge Chamber of Sorrows paint scheme:


Updated on 2013/10/31
Not happy with the number of coats on the red with no primer  - so re-did the painting with Army painter spray black primer as the 1st step - worked much better, able to do the red in 1 coat with a just few touchups.  Also had a lot of people asking about sealers - took the original tiles I had painted and sprayed with sealer - look just as good, maybe a tiny bit shinier then the original factory paints after sealing, but hard to tell at table top distance.  Also did a wall piece complete with metallic paint.   Also painted up 2 4x6 large floor tiles.


Tiles primed with Army painter spray black primer 

Tiles primed with Army painter spray black primer


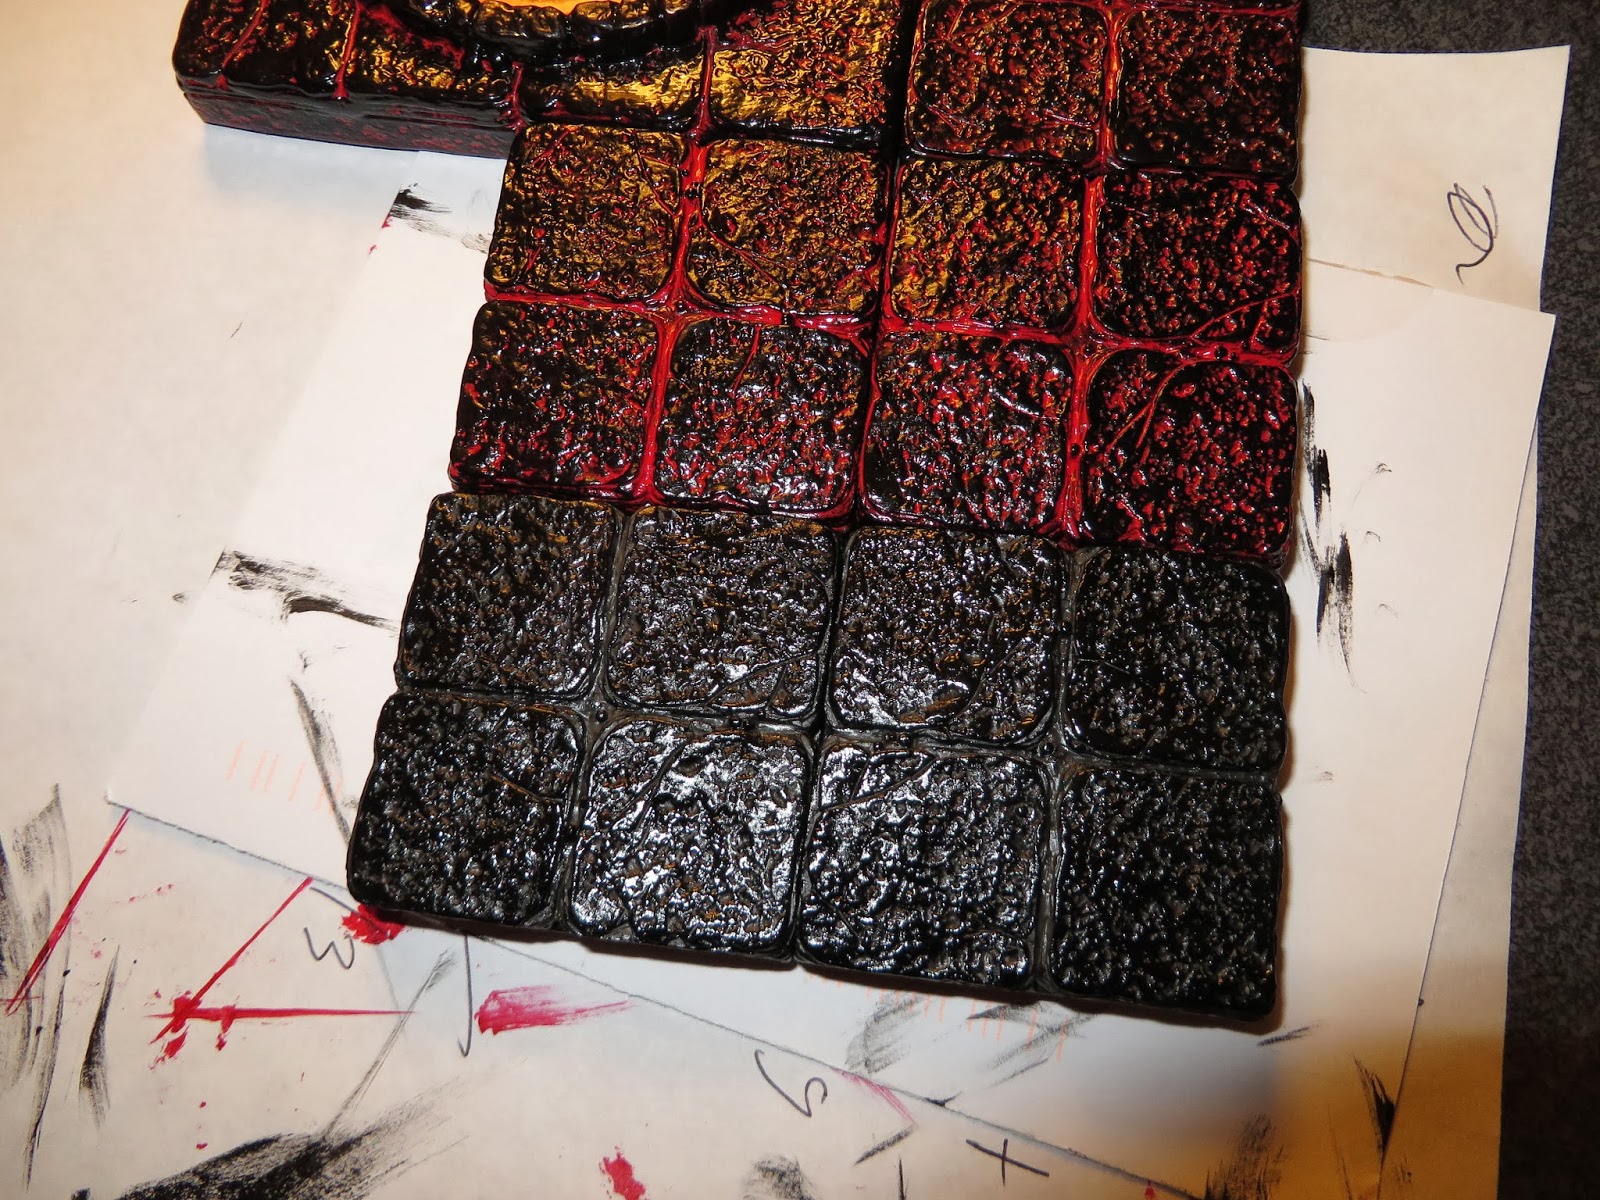
Here is painted with no primer - took about 3 coats to get a good coating, the red had trouble going into the low points - next time may start with primer.  I recommend army painter spray primer - its on the recommended list for DF tiles


Here is painted with primer - army painter black spray primer.  Then the layer of red on top - much easier to do......   The specially formulated Pokorny paints may not need primer, but it makes it easier when using "other" paints.  ;-)


used a blow dryer to dry the paint

Next coat for the black - didn't do dry brush, but wiped off the brush on the edge of my paint bowl so that it wasn't dripping.  Brushed straight across and didn't push into the low points.  Used a Grumbacher 6 filbert brush.
Top 2 are factory painted, and the bottom 2 I painted

Top 2 are factory painted, and the bottom 2 I painted
2 CoS hand painted 4x6 floor DF tiles!


used a blow dryer to dry the paint

Top 2 are factory painted, and the bottom 2 I painted

Top 2 are factory painted, and the bottom 2 I painted.   Dwarven Forge Chamber of Sorrows!  I couldn't tell them apart easily, so I labeled on the back of the tile the ones I did.

Tried 2 with just the black to see about making some transition pieces - not super impressed, will keep looking

And what you were all waiting for - here is the paint I used - Liquitex glossies - red, black

Here is once the tiles were sealed - used Rust-Oleum Zinsser 408 Bulls Eye Clear Shellac Spray.
Top 2 are factory painted, and the bottom 2 I painted. Here is once the tiles were sealed - used Rust-Oleum Zinsser 408 Bulls Eye Clear Shellac Spray.

Top 2 are factory painted, and the bottom 2 I painted. Here is once the tiles were sealed - used Rust-Oleum Zinsser 408 Bulls Eye Clear Shellac Spray.


For the walls - I wasn't planning on doing any, I just wanted more CoS floor pieces... but for the walls - I didn't have a paint that looked like an exact match, but  DecoArt - Dazzling Metallics: Rich Espresso looked to be pretty close.

 DecoArt - Dazzling Metallics: Rich Espresso - factory paint on the left, my paint on the right.  For some reason the wall pieces I got had a tiny bit of wash on the dungeon floor part, so they were actually a little darker then the other dungeon floor tiles.  Mine on the right is actually a closer match, but a light black wash could easily be added.  Closeup the match is pretty close, and since I'm not planning on doing any more CoS wall pieces, I'll call it good.  Especially from table top distance I couldn't tell the difference.

factory paint on the left, my paint on the right.

factory paint on the left, my paint on the right.